
So its been just about 4 days since the release of Windows 10 and we’re already seeing about 14 Million active users on the news. If you’re finding this blog post, you’re probably looking for ways to do a clean install or upgrade to Windows 10 on your machine. Before we get to those steps here’s a few important points we need to get out of the way;
- The upgrade to Windows 10 is not an amnesty program for those with pirated versions of Windows 7 or 8.1. If you use a non-genuine version and you do the upgrade, you’ll still see the same non-genuine notification on your system.
- The process is a bit counter intuitive. It requires you to first upgrade (non-clean installation) your current version of windows to windows 10. This is to properly overwrite your product key on your BIOS (first time i heard of it but its now a feature on motherboards to avoid piracy), then re-do a download prior to a clean installation onto a usb media device so on and so forth.
- If you bought a computer with windows 8, you probably can’t see the product key. Those are now apparently embedded into the BIOS to avoid being compromised. You can view it on programs like Nirsoft.
- Just make sure you copy your product key in case you need to revert back to Windows 8 (don’t touch that rescue drive either, that’s still a legit installer for windows).
Once you are backed up, let’s get into upgrading and installing windows 10 step by step;
- Make sure you have the “get windows 10” app running and make sure you’ve reserved a copy of your windows 10.
- Create a Microsoft Live account using your email (like the one you use for the Xbox). If you have an xbox account, just use that one.
- Once that’s done and it says you’re lined up for the upgrade, head to this link at the Microsoft main site and download the “Media Creation Tool”. Also make sure you have the appropriate version if its x32 or x64.
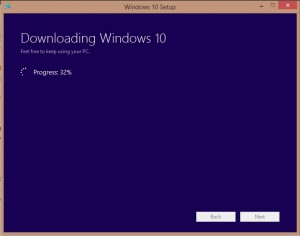
- Run the media creation software tool and select “Upgrade this PC now”. Then follow the prompts to get a non-clean version of windows 10 on your existing drive. Don’t forget to make sure to activate the copy of windows 10 to make sure its activated and your product key is set on the Microsoft servers under your identity.
- Now that you have a non-clean version of Windows 10 running, and you have your new Windows 10 product <a href="http://n00bgamer software for tracking projects.com/wp-content/uploads/2015/08/Windows-10-Media-Creation-Tool.jpg”>
 key set into your BIOS (you can view it using Nirsoft), you’ll have to go back and re-download the media creation tool (yes i know this is tedious but each download is unique). Also make sure you copy down the EXACT VERSION that Windows 10 installed as you’ll need to select that version on the re-download of the installer to a USB drive.
 - Run the re-downloaded Media Creation tool and this time select “Create Installation Media for another PC” and then make sure to point it to a USB drive that’s got more than 3Gb of available space.
- Once the download is finished and installed on a bootable USB drive you just created, reboot the computer and this time use the BIOS option to boot from the USB drive you created.
- Follow the setup prompts and just skip the option to enter a product key. (Your hardware and BIOS is already saved and activated on microsoft’s servers, you just need to re-activate it and you’ll be ok). If it doesn’t activate on the new installation just force the activation to run by using the cmd command slmgr.vbs /ato.
Enjoy Windows 10 guys!
Also send us some screenshots of your brand new Blue Screens of Death!
8/3/2015 Update: The downloadable upgrade now gives you the option to “keep nothing” option which is almost similar to a clean install. The above listed process still applies for those that want to delete partitions to reconfigure their drive.
8/7/2015 Update: All systems working perfectly. No conflicts detected and these new Xbox games features on pc rock.